Setting up your agent laboratory
Note: this page is not up to date any more. See the notes I sent out by e-mail, namely: 1. I tried out an alternative Git client. There are some pitfalls and hiccups when connecting SourceTree to github (this used to work much smoother in earlier versions). Instead, I recommend to work with https://desktop.github.com , which seems much more intuitive. 2. You do not need to connect to upstream any more. Instead, I will push the exercises each weak into your repository. That simplifies things for you a little. I already pushed the simulation code and the first exercise in each of your repositories. 3. I'll see how well visual studio code works with the simulation. Visual studio is a little lighter and easier to handle than eclipse, but I'm not sure yet if everything works well with it. I'll provide an update sometime next week.
To take part in this course, you'll need to install a number of programs. They are all free to use.
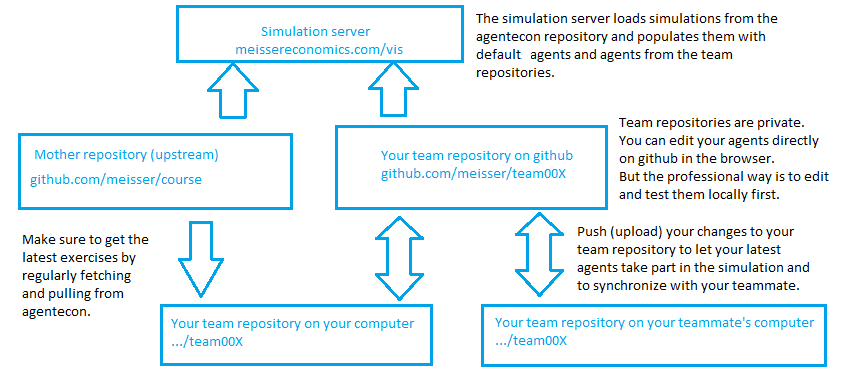 This sketch gives you a general idea of the overall setup. In the following, I describe how to install all the software needed to successfully synchronize your code.
Install the Java 13 Development Kit. Note that the JRE which users sometimes already have installed is not enough. The difference between the JRE and the JDK is that the JRE lets you run Java programs, while the JDK comes with a compiler and lots of documentation for programmers, allowing you to create Java programs.
Install Source Tree. When asked for connecting with a Git account, provide your Github account and clone your team repository (e.g. "team003"). This of course only works after you have provided me with your Git user name, I invited you to your team's repository, and you have accepted the invitation. You can also clone your repository manually after the installation completed. The repository URL looks like https://username@github.com/meisser/team10X.git, depending on your git username and team number. If you cannot access this URL with a web browser, try to login at github.com and visit the page again. If that does not work, something went wrong and you should contact me.
To check whether your changes have been properly uploaded, you can browse your repository in the web. Once the changes are there, the simulation server will pick them up and update the simulation. Install the latest version of eclipse, choose "Eclipse IDE for Java Developers" when asked. Congratulations, you are ready to start with exercise 1.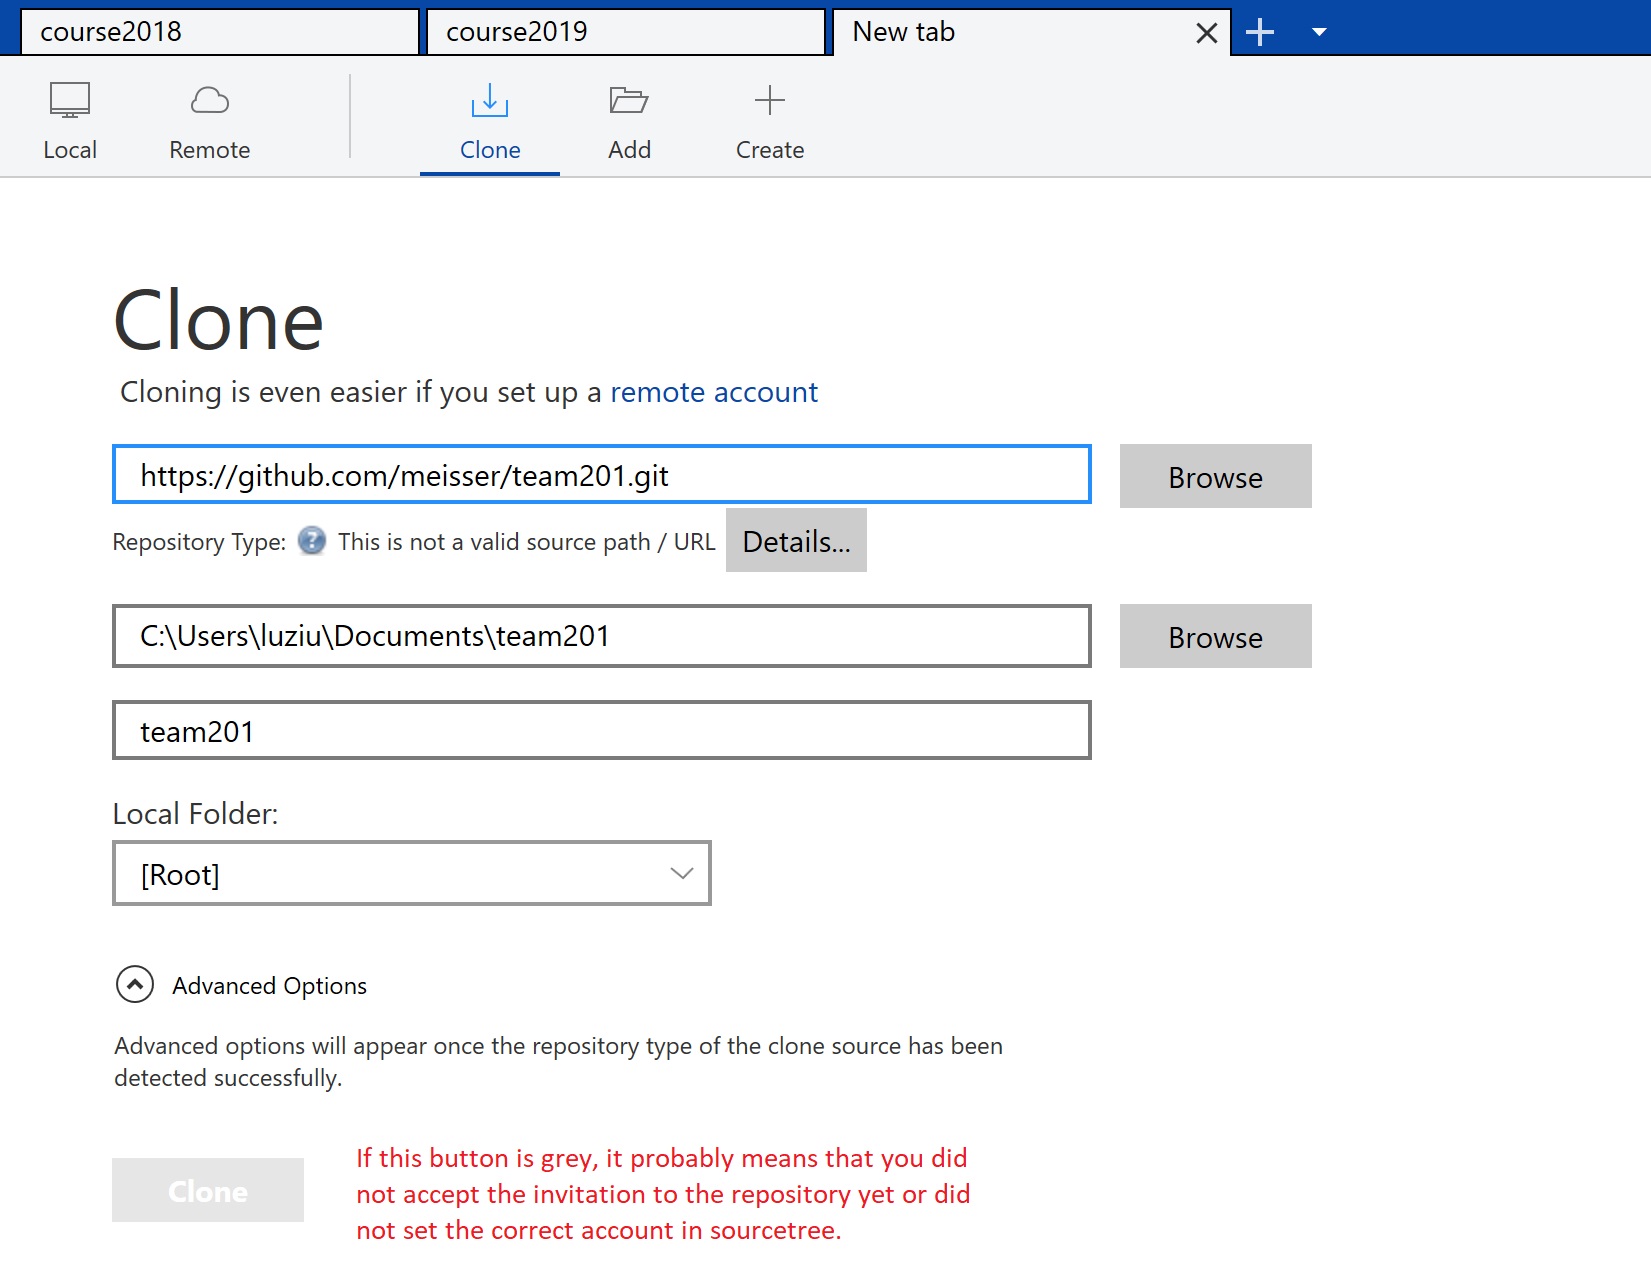 Once you have cloned your team repository, add remote repository "https://github.com/meisser/course2019.git" and name it "upstream" as shown above. Upstream is the original repository that always hosts the latest version of the simulation and the latest exercises.To download the latest exercises to your computer, you first need to click "fetch" to "fetch from all remotes". This will make SourceTree show the latest available versions. To actually get them, you further need to click "pull" and then select upstream master as shown above. If you are lucky, everyhing works fine. If not, there are probably some conflicts, i.e. files that you changed locally and that also changed in the upstream repository in a conflicting way. The easiest way to resolve these conflicts is to discard your local changes. But as long as you only change things in the exercise folders, there should not be any conflicts.Once you have made some changes (more about that in a minute), you can either discard them or upload them to your own repository named origin. To do so, commit the changes and push them to origin as shown above. It is highly recommended to always pull the latest changes from origin before you do anything in order to avoid conflicts with your teammate. Also do this before pulling from upstream in case your teammate already did so.In the JDK settings, you should add the "-ea" flag. This enables assertions by default, making the simulations fail faster on errors, thereby making it easier to detect them. (The fail fast principle.)
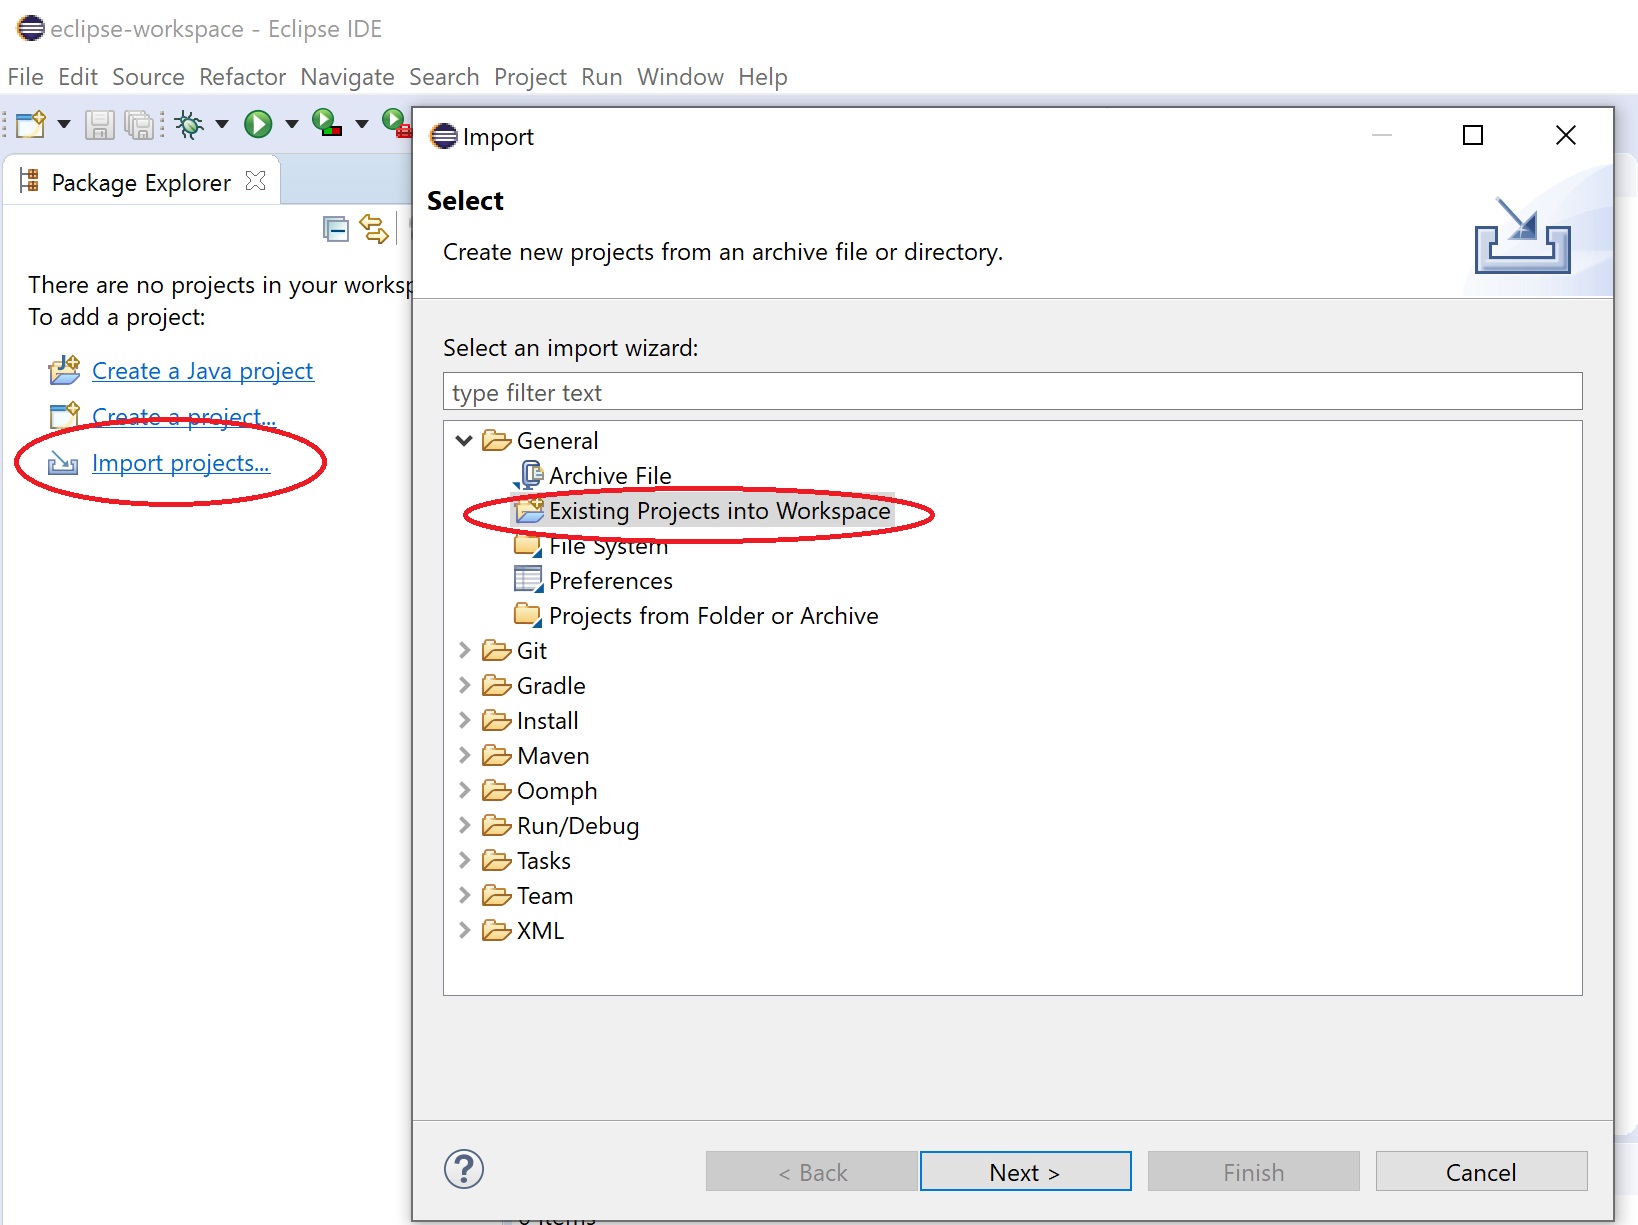 Import the four agent-based simulation projects as shown above.To run a class, right-click on it and choose "run as Java application".